DLC:Драконий Оплот
Пространства имён
Действия на странице


Дата выпуска :
Дата выпуска :
Дата выпуска :
Все подписчики ESO Plus получат это дополнение бесплатно, а остальные игроки смогут купить его во внутри игровом кронном магазине за 2,000 .
Драконий Оплот (Dragonhold) содержит новую зону Южного Эльсвейра (Southern Elsweyr) и завершает годовою сагу Сезон Драконов (Season of the Dragon) начатую в дополнении DLC:Камень ярости.
Dragonhold также будет доступен для покупки как часть Коллекционного набора дополнения «Драконий Оплот» (Dragonhold Collector’s Bundle) за 4,000 .
Вместе с дополнением выйдет (Обновление 24), оно включает в себя первую волну наших заявленных улучшений производительности, Twitch Drops для консолей, а также дополнительные исправления и изменения баланса.
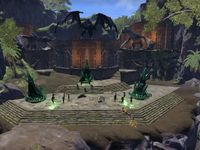
Древнее королевство каджитов, Пеллитин, лежит в руинах. Разрушенный ужасной чумой и ее очищающим огнем десятилетия назад, Южный Эльсвейр превратился в землю, где не властен закон, он населен работорговцами, пиратами и разбойниками.
По мере того, как беженцы из окрестных земель медленно продвигаются к столице — городу Сенчалу, немногие оставшиеся защитники города собирают свои силы против хаоса.
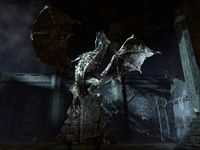
Зло угрожает народу Пеллитина. Драконы, освободившиеся в Залах Колосса, принесли свою ярость на юг. При поддержке культа поклонников, известного как Орден Новолуния, они опустошают регион и вынашивают зловещие планы.
Двигаясь по главному квесту, вы будете сотрудничать с Саем Саханом, знакомым вам по основному квесту игры. Вы соберете команду пиратов и авантюристов и восстановите древний орден, известный как Драконья стража (Dragonguard).
Эта древняя организация охотников на драконов должна вернуться, чтобы помочь каджитам Эльсвейра в борьбе с драконами. Вместе вы и ваши новые союзники должны выяснить секреты потерянного ордена Драконьей Стражи и сразиться с могущественным драконом Лаатвулоном и его культистами Новолуния.
Dragonhold также является финалом годичной саги «Сезон Дракона». Начиная с дополнения DLC:Камень ярости и продолжая главой Эльсвейром и дополнением DLC:Сокрушитель чешуи, история, которая началась в начале года достигает своей кульминации в этом последнем DLC 2019 года.
В сюжетных квестах Dragonhold, вам и вашим союзникам предстоит положить конец махинациям дракона Каалгронтида (из основной истории Главы Эльсвейра). Вы разрушите планы этого ужасного дракона в Эльсвейре. Теперь, в Южном Эльсвейре, вы должны навсегда остановить его, прежде чем он сможет обрести силу богов!
За покупку этого дополнения вам будет предоставлена награда за лояльность — Головной убор — Topal Corsair Hat (Topal Corsair Hat).
Все достижения DLC можно посмотреть здесь.
Также в честь этого дополнения был представлен новый трейлер The Elder Scrolls Online: Dragonhold – Official Trailer — видеоролик анонса:
Источник
| This page is currently being rewritten as part of the Online Quest Project. The page is being both written and checked. All users are welcome to make changes to the page. If you make a change that is relevant to the project, please update this template accordingly, and make sure you have observed the project guidelines. |
Quick Summary: written by MolagBallet, not checked
Walkthrough: written by MolagBallet, not checked
Quest Stages: written by HoodBot, checked by MolagBallet
 | Infiltrate the Order of the New Moon and learn more about their intentions. |
| Zone: | Southern Elsweyr This quest is part of the Zone Story |
|---|---|
| Faction: | Dragonguard |
| Quest Giver: | Aeliah Renmus, Sidura |
| Location(s): | Black Kiergo Arena, Dragonguard Sanctum, New Moon Fortress, Senchal Outlaws Refuge, Senchal Palace, Senchal |
| Previous Quest: | Uneasy Alliances |
| Next Quest: | The Pride of Alkosh |
| Reward: | Venerable Dragonguard Bow 1 Skill Point High Leveled Gold |
| XP Gain: | High XP |
| ID: | 6399 |

Aeliah Renmus knows that the Order of the New Moon is recruiting in Senchal, and she can get you in to see her father without an appointment so that you may speak to him about it. Head on over to Senchal Palace and enter the general’s office. You will arrive at the tail end of a conversation between him and a woman named Buzinda, whose daughter is missing. General Renmus still can’t spare anyone to help your investigation, but gives you clearance to do so yourself. He recommends speaking with the woman who just left, as she suspects her daughter may have been recruited by the Order.
Buzinda is lingering outside the general’s office, grieving. She’s elated that you’ve joined in the search for her daughter, and mentions that someone named Kazahn might know something about Lahini’s whereabouts. He’s refused to speak with Buzinda so far. You can find Kazahn downstairs at the Sweet Breezes Inn, drinking his days away with his friends Ranza and Dahjarsi. Today, he is accompanied by Za’ji and Caska.
Kazahn isn’t feeling very talkative on the subject of Lahini, but if you persuade him to tell you more, he confesses that Lahini has been hanging around the New Moon’s recruiter, and that he and his friends followed him somewhere. Well, Ranza followed him, at least. Ranza offers to draw you a map leading to the place the recruiter stopped. He does so, and gives you a Crude Map. Follow the map outside to an abandoned house past the guild traders and above the harbor.
In the attic is a letter detailing orders to the New Moon recruiter, named Shirnama. The cult needs more warriors, so Shirnama is visiting a place called the Black Kiergo. Caska knows the place. When you’re done investigating the attic, Aeliah and Caska will call up to you from the second floor. Tell them what you know, and ask Caska about the Arena. Caska tells you that the Black Kiergo is a fighting ring located in the outlaws refuge below Senchal. She was the undefeated champion before she retired, so she can probably get you in.
Enter the refuge and take the hallway past the merchant. Caska is waiting for you in front of the arena’s entrance with the bouncer, Do’mazir. He won’t let you in unless you can convince Caska to compete in the arena once more. She begrudgingly obliges, which grants you entry. Head on down into the ring and wait for the fight to start.
There are five rounds, the first four of which are fairly easy. The last round consists of fighting Do’mazir and Jiren-dar, a Dagi wind mage. Take them both down and head through the door to speak with Shirnama. He tells you that your strength is admirable, but is nothing against the Dragons. He then offers you a place in the Order of the New Moon, as they are looking for warriors such as yourself. He gives you a pendant, which you must show to the guard in front of the cult’s fortress in the Tenmar Forest, east of Black Heights.
Head north through the maze and light the brazier on the other side of the doorway that the blue barrier is blocking entry through. Lighting the brazier removes the barrier. Once the barrier is down, push the Puzzle Cube through the maze and onto the button in the center of the room. Press on to the New Moon Temple once you’ve opened the way with the Puzzle Cube switch.
In the next room, you’ll come across Lahini, who is fruitlessly kicking a Puzzle Cube. Upon speaking to her, you confirm her identity and learn that she is struggling with the puzzle. Lahini asks if she can tag along with you, and rejoices when you allow it. She will run along the course as you clear the way for her.
Jump over the western railing and climb up the wooden structure to light the brazier. When lit, the way is open to push the cube through the hall. There is a second barrier at the end of the cube’s track. Jump over the wall behind the barrier, climb the wooden platforms there, and light the brazier to open the way forward once more. For now, you should leave the cube here, but you can push it in front of the next barrier if you’d like. Don’t push it past the third barrier, though. If you do, you risk getting it stuck. The third barrier contains the exit and two buttons for Puzzle Cubes to sit on. You’re going to need a second puzzle cube.
There is a fourth barrier past the third one. Pass through the doorway and push the cube through. Jump over the eastern wall and climb the wooden platforms up to the third brazier, which opens the exit barrier and closes the second cube’s chamber off when lit, and renders the exit inaccessible while opening the way to the second cube’s dwelling when unlit. When you have the second cube in the hallway, light this brazier and push both cubes onto their respective buttons (it doesn’t matter which cube goes on which button; all that matters is that the buttons are pressed). Pass on through the door now that the way is opened.
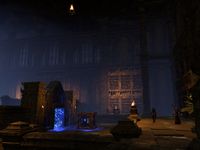
The Trial Master is in this hallway with a large group of recruits. Speak with her. Apparently, there’s some sort of ceremony taking place outside, where some will give their strength to the New Moon, and others, such as yourself, will be granted power. When the trial master leaves, you must speak with Lahini and convince her to go home. If you persuade her, she will leave. If you do not, she will stay for the ceremony. Caska arrives when you’re done speaking with Lahini. She tells you that the green stone you found at the quarry is present in the ritual chamber, and there’s a lot of it. She doesn’t like the look of things, and wishes to observe the ceremony separate from the group that just went in. There’s a balcony you can use to view the ritual from a safe distance. Navigate the side hallway and enter the New Moon Ritual Chamber.
Laatvulon, the recruits, and two other Dragons are here. Laatvulon tells the recruits to offer their power to the New Moon, then he shouts, causing the green aeonstone to glow. Caska notices that there are two stones on the balcony. There are cultists presiding over them, but they are just as preoccupied as the recruits below. Caska wants to smash the stones. She’ll take one, you’ll take the other, and it is imperative that you destroy the balcony stones at the same time. Head on over to the stone on the right, and don’t worry about the cultists. They’ll give you no trouble. Smash the aeonstone and run through the door behind you as the Dragons fly off.
Laatvulon gives chase as you pass through the fortress. Cut a path through his minions and avoid his icy attacks. He will freeze you, spit ice balls at you, and when faced with a long pathway, he will fly along the path and bombard you with his frozen breath. Take cover when you can, and do everything in your power to survive the onslaught. Eventually, you’ll be able to meet up with Caska near a river. You need to report back to Sai Sahan with your findings. The fortress drops you off behind the Colorworks at Black Heights. From there, head to the wayshrine and fast travel to the Dragonguard Sanctum to be rewarded by Sai Sahan for infiltrating the Order.
Источник
➤ Adblock